
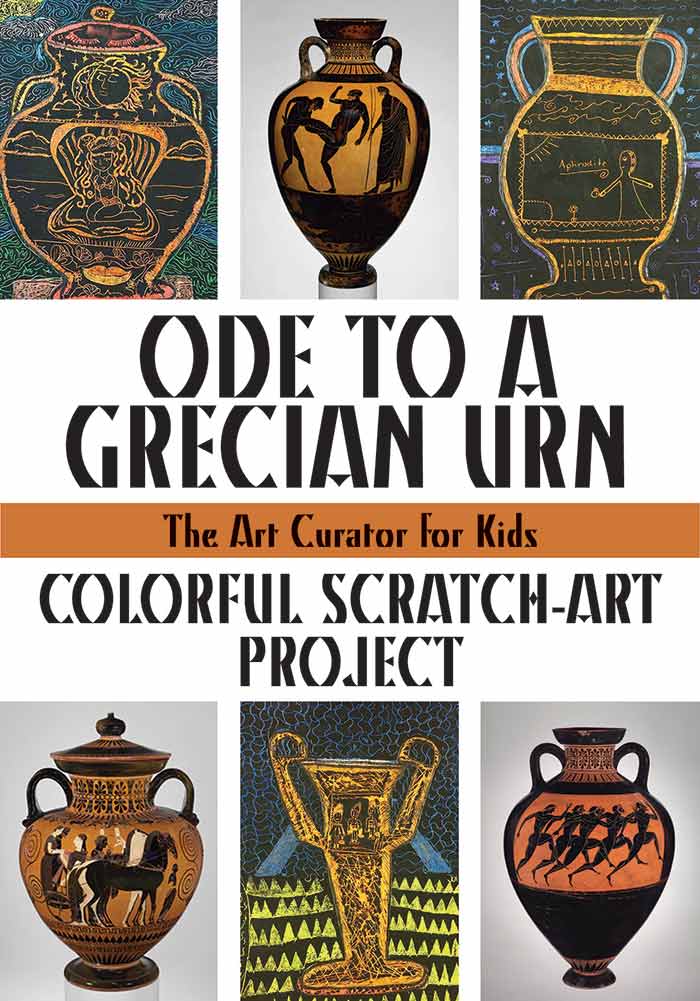
I teach at a classical school, and my sixth graders are studying Ancient Greece. I planned a multi-step project – within the context of a larger lesson on Greek art from this time period – to create Greek amphora scratch-art.
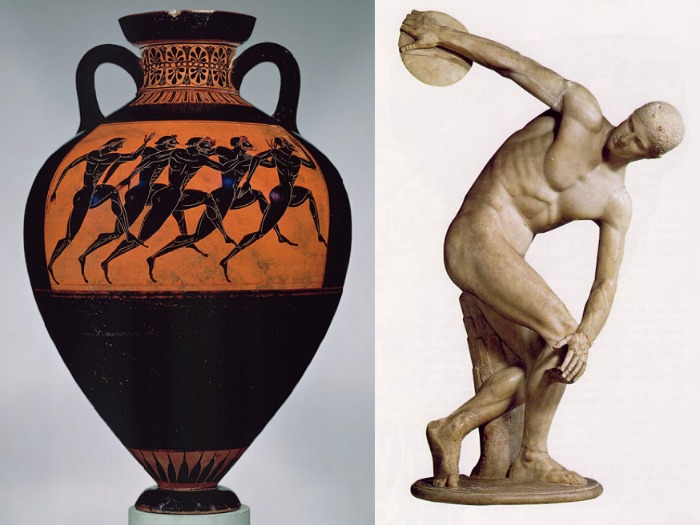
We first did a general lesson on Greece where we learned about their architecture and sculpture. I showed them a picture of a Greek amphora painted with a scene of Olympians running, then one of the sculpture “The Discobolus of Myron” (the Discus Thrower). I asked my students to think about the life of Ancient Greece. What did they think the culture valued, by looking at those examples? They saw the focus on the body and athletics, and emphasis of the individual.
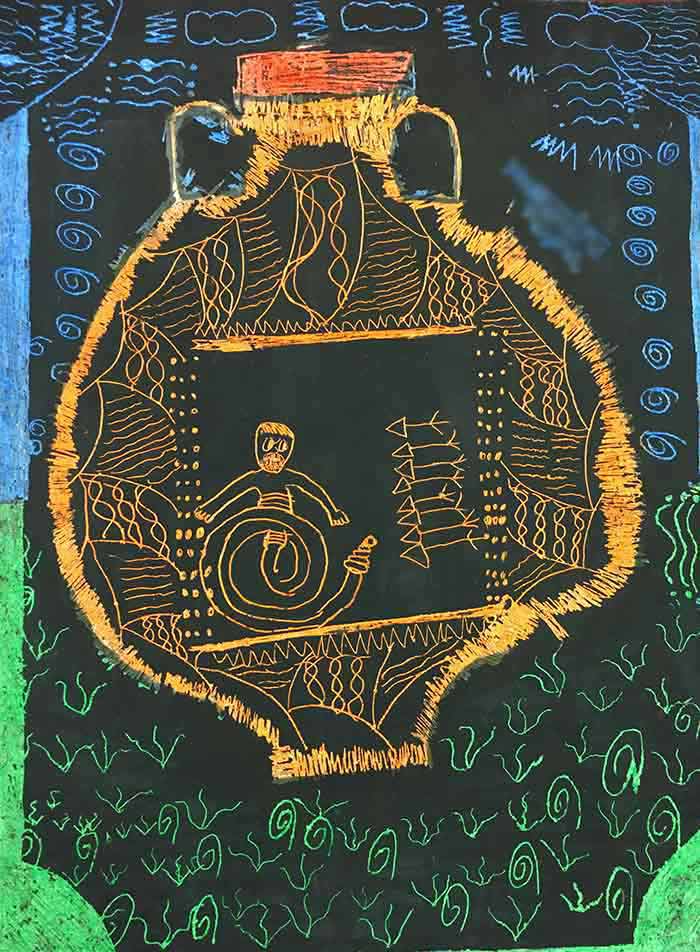
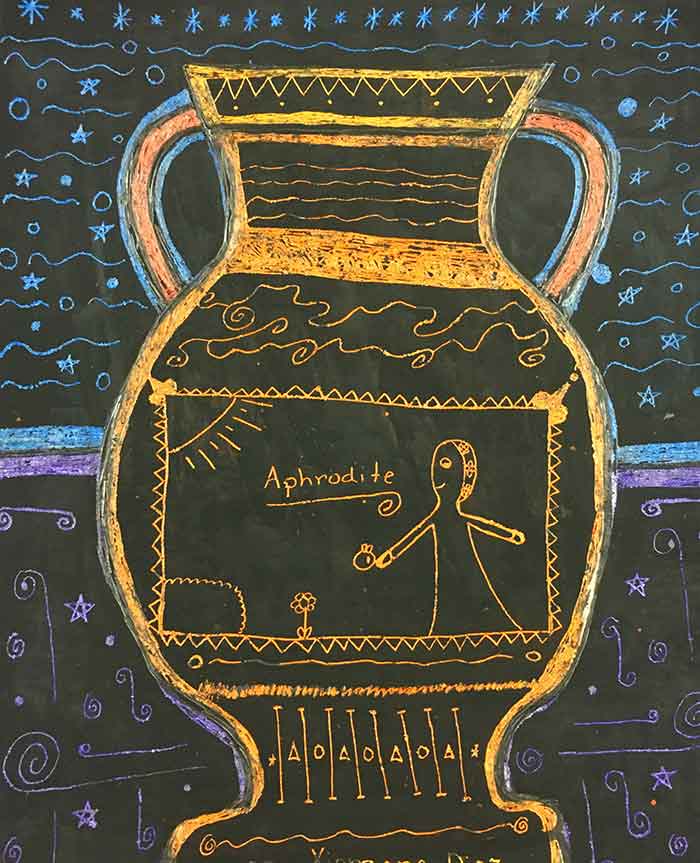
Then we talked about Greek urns or vases – often made to store and carry food and water, and also wine, or used for decorative purposes. Amphorae, one type of urn or vase, were made in shapes that are very recognizable, with looping handles under the neck of the vase that widens in the middle.
Most amphoras and other Greek vase types and shapes were ceramic. The decorations on the sides of amphoras and other vases from this period tell us a lot about the culture and values of that time period. And they were often beautiful – poet John Keats wrote an amphora in “Ode to a Grecian Urn” (1918), with the famous final stanzas:
“Beauty is truth, truth beauty,—that is all / Ye know on earth, and all ye need to know.”
When I do my art history lessons I always have the students do a warm-up activity when they come into the classroom. One day, I had the students choose and illustrate a scene or story from Greek mythology that they knew. (If my students had not come with that knowledge, I would’ve given them a list of Greek gods and goddesses or read a book with them.) They had to pick a god or goddess and write a little bit about them and share the story from their drawing.
Then I showed my students this video that shows the steps of how amphoras were made, from working with the clay to shaping it and then painting on the designs.
Step by step scratch-off
Our scratch-art project didn’t involve clay, but there were multiple steps that the students needed to follow to get to the finished product. As you can see, the end result of a scratch-off project looks something like black-figure or red-figure glazing processes – techniques used in successive periods in Ancient Greece as artists refined their processes for decorating the urns.
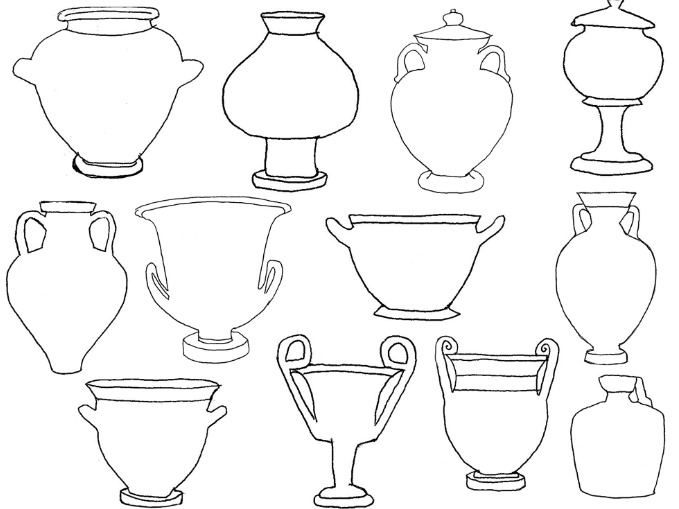
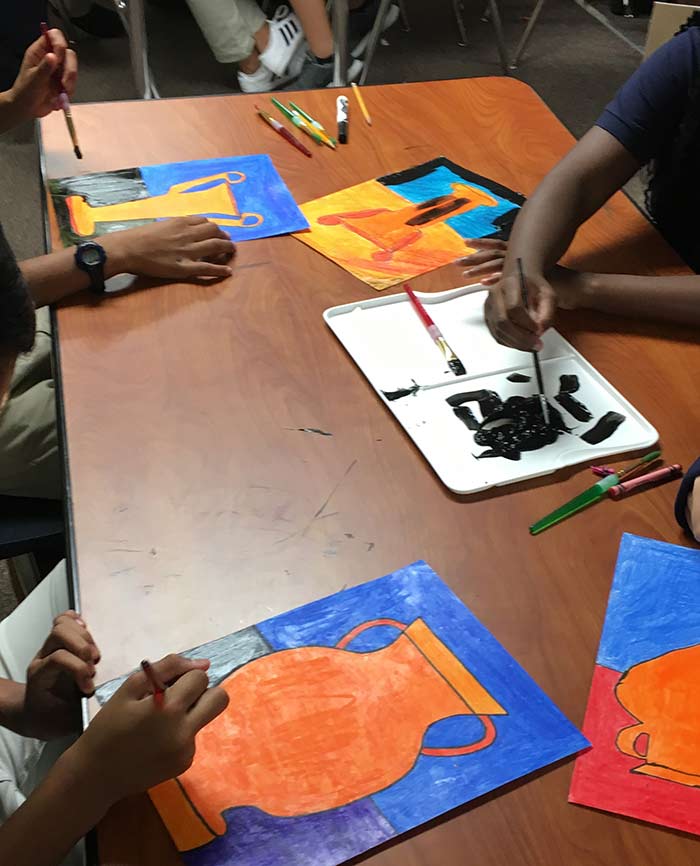
I had drawn a number of different vase shapes, which I projected onto the wall and had the students draw their favorite (or their version of it) with a black marker on a piece of 9”x12” piece of card stock. The students drew in the horizon line, and then colored inside the lines of the urns with several different colors of orange that I gave them. They colored the background with contrasting colors like blue and green.
They had to press super-hard with the crayons to get a smooth, thick layer of color, or the next step wouldn’t work. This took several days of class time! (If they finished coloring before the end of the class, they could continue to work on their drawing of the god or goddess for their vase; there was a good amount of sketching time to be prepared for next steps.)

After they were done coloring the first layer, the students painted over the whole page with a mixture of black tempera paint mixed with a few drops of dish soap – I learned about this trick on an art teacher’s online group. (The dish soap makes it easier to scratch off the paint.) This step can be kind of alarming to students – covering up all that color with black paint – but the reveal is worth it.
When the paint dried, we started scratching in the background, the area outside of the outline of the vase. Wooden scratching sticks with a pointed tip work well, of course, to reveal the color underneath the paint. But I couldn’t find these, so we used whatever we could find – you could use toothpicks, a fork, a pencil, anything that is sharp enough to make a mark but won’t tear the paper. (If you use a pencil, be aware that it can show up on the background, so using a colored pencil is a good option.)
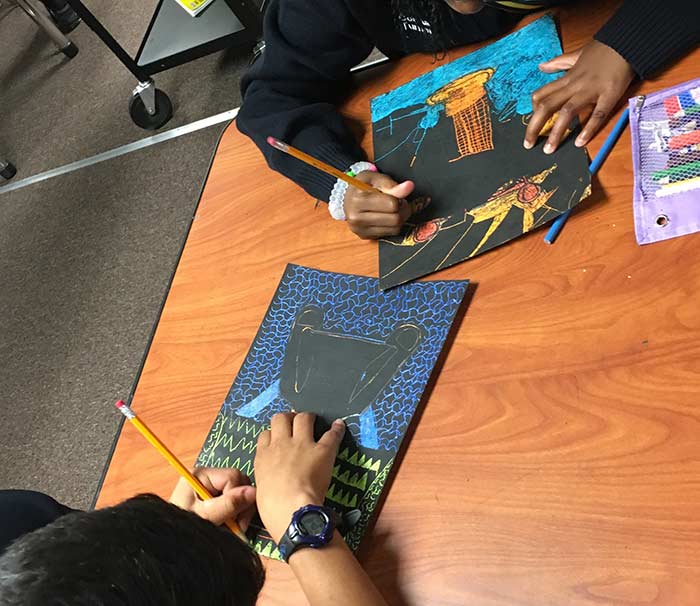
On the first day of scratching through the black paint, the students worked on the background: the sky and the ground beneath the amphora. One of my brilliant students realized that you could hold the paper up to a light to see where the vase was located. Then I had them scratch off the border around the amphora, as well as the handles and the lid.
The project looked really good at this point – the colors were really shining through.
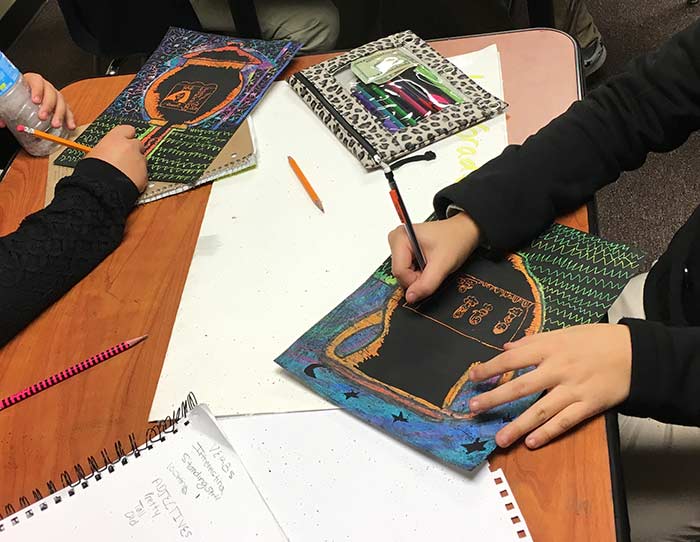
Once they knew where the edges were, I had the students draw a square or rectangle on the widest part of the vase. In this space, they reproduced the illustration they had made previously of their god or goddess story.
This step can be a challenge. One of my students was nervous about being able to transfer her sketch, so I helped her with a technique that I will incorporate into the project the next time I do it. I will have the students make their preliminary sketch the same size as it will be on the finished urn they scratch. Then they will use a pencil to cover the back side of the sketch. Then they can place their drawing on to the square or rectangle on their scratch-art page and retrace the lines. The graphite will show up on the black tempera – a shiny guideline to scratch through to transfer their illustration. It worked really well.

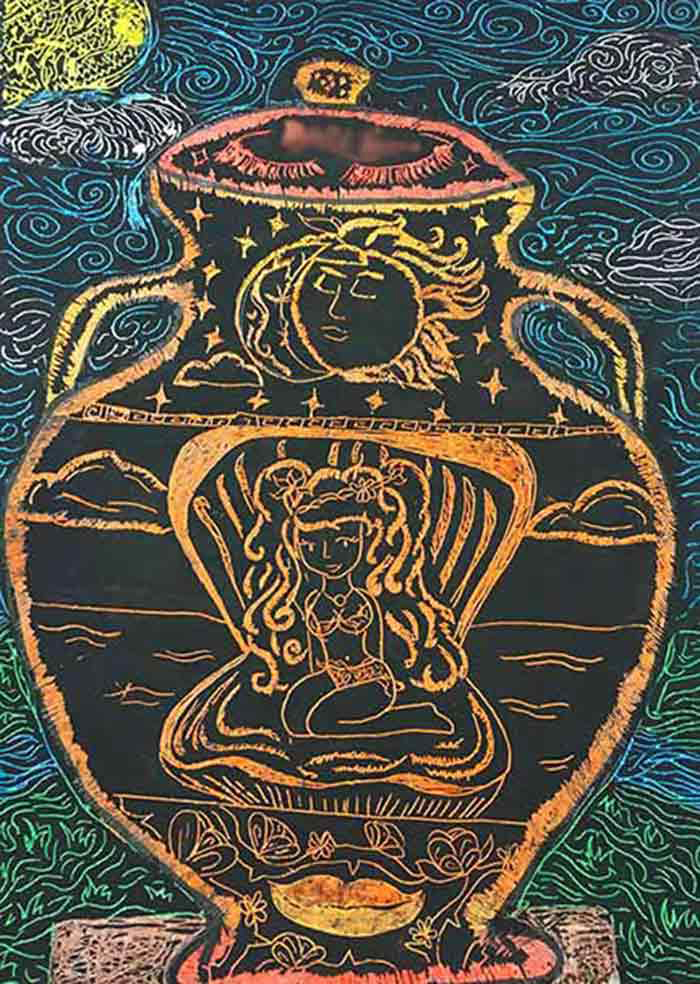
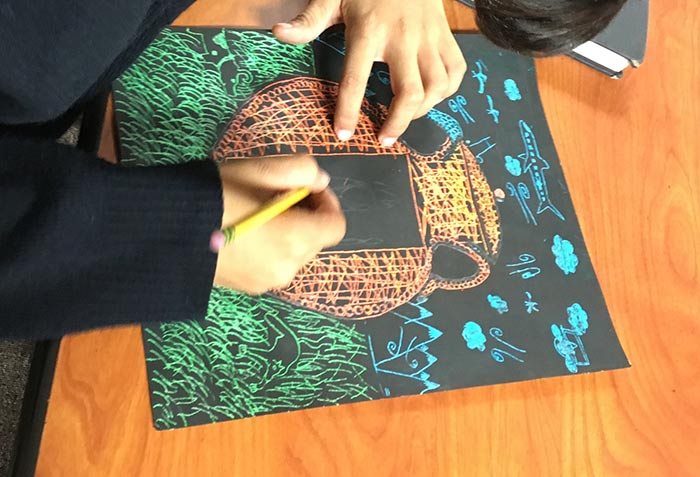
After they transferred their illustrations on to the scratch art vase, the students finished the space above and below. They decorated the foot and the neck of the urn with patterns and shapes.
Classical Sculpture, Ancient Greek, & Ancient Rome Lesson Bundle
In these lessons, students will learn about the art of Ancient Greece & Ancient Rome. Plus, get a complete Classical Sculpture lesson with an interactive activity to empower students to figure out the conventions on their own!
How were they able to find where their pot was on the page of black?
They did the backgrounds first and stopped when they hit the pot.
Love this lesson! Do you happend to have a rubric or project reflection that you use with it? Thanks so much!
I don’t think I have one for this! I do have a standard one in the resource library that you could adapt.
What a fabulous project! I was looking for something to enhance our study of Greece. Thank you so much! This is it!
Ballpark ratio of dish soap to paint? I tried a practice one but am finding it hard to scrape through the paint.
It’s been awhile, so I am not sure exactly what I used, but this website says equal parts. https://www.hgtv.com/design/make-and-celebrate/handmade/how-to-make-your-own-scratch-art The other thing that is really important, is that the crayon on the background is colored really solid. Hope this helps!