
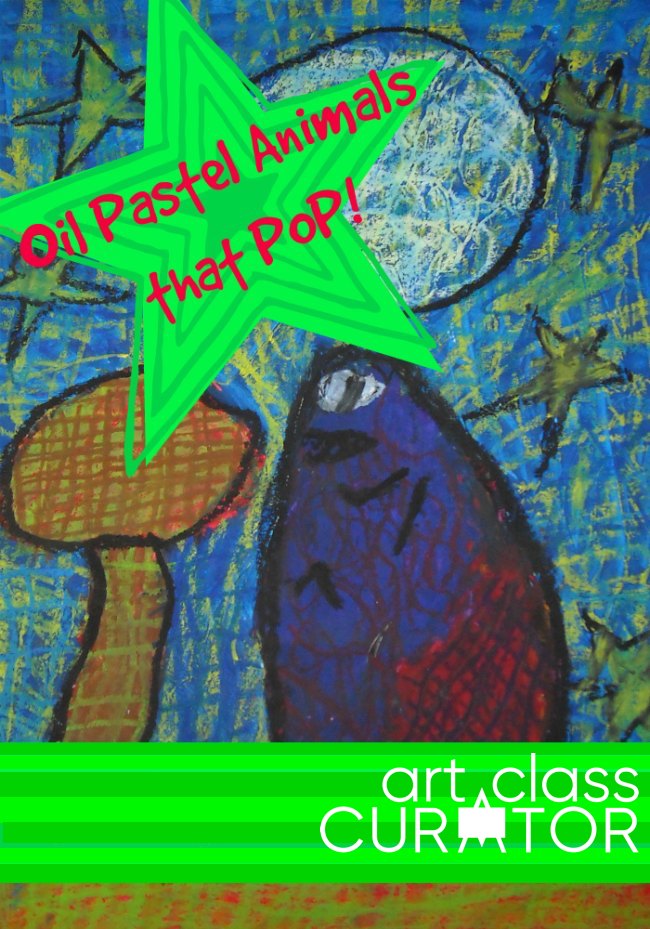
 Oil pastels are one of my favorite art media to work with. The color is bright and pure, they are soft and easy-to-blend, and the color goes on smoothly. It’s all great until you put an oil pastel into a kid’s hand. Instantly, you’ve got a mess. Hands and faces and shirts and floors covered in color, artworks smudged and almost ruined, and the bright, pure oil sticks dulled and mixed with all of the other colors.
When a kid starts on a white piece of paper, the final product often looked hopelessly smudged and outright dirty. I know it’s about the process, and not about the product, but still. Dirty, smudged artworks are sad. But, we can prevent this.
I don’t know where I learned about this project when I was teaching. I was all over the web looking for inspiration, so this was not my idea (if it is yours, let me know. This was around 2009). But, it worked wonders in my art class.
Step One: Draw the picture.
In my lesson, I did animals. I had the students draw them BIG on the paper. I showed them a bunch of line drawings of animals I printed from http://www.drawingnow.com/ for inspiration.
The key really is to draw something with not too much detail. A big, simple line drawing is perfect. Try to have them avoid adding suns and trees and flowers as they are prone to do. It’s close to impossible to tell a first grader not to include flowers and suns and trees, but do your best. 🙂 You’ll see below a lot of that stuff slipped through.
 I also threw in a small lesson about a horizon line and where to draw it on the paper. At the end of this step, you need a big drawing with a horizon line.
Step Two: Paint the Picture.
This is the secret step to really make these artworks pop. Have students paint their pictures using only 2 colors (plus whatever happens when you mix those two colors). Tempera paint works perfectly.
Have students paint the whole entire page and not to worry about the details like eyes, nose, etc. We will add those in later. This is painting the background and the simple shapes.
(The below picture is not complete. All the white should be covered.)
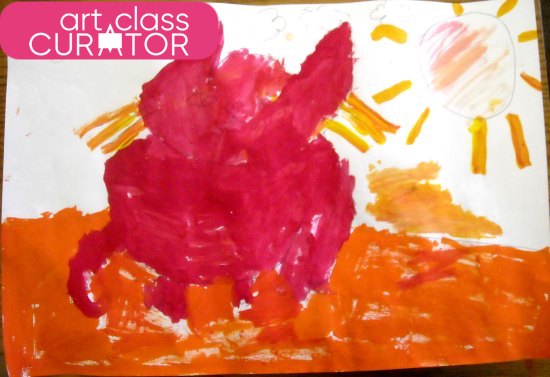 To illustrate what a difference the paint makes, take a look at this example. This student had to miss a couple of days of art, so he never got to finish his painting. Notice the difference of the top of the artwork to the bottom. It makes a huge difference!
 Any two colors will work. I did this project with the whole school–kinder to grade 5. With each grade, I used a different two colors and worked in a color mixing lesson. (Again, this idea came from the internet. Thanks, anonymous art teacher!)
Grades K-2 did two primary colors plus the secondary color mixed with those two paints. One grade got red and yellow only and mixed orange. One got blue and yellow and mixed green. One got blue and red and mixed purple.
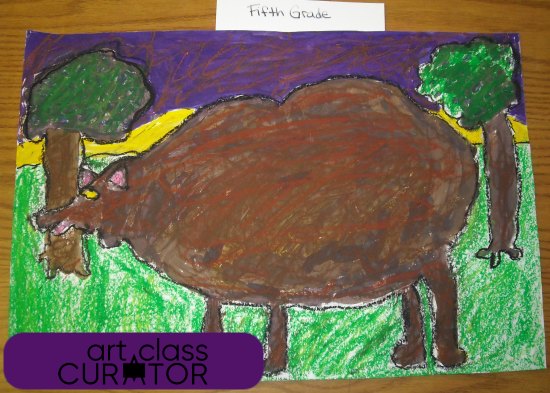
 Grades 3-5 got to complementary colors and mixed them to make brown. Red/green, orange/blue, and purple/yellow were the three sets here.
Step Three: Color with Oil Pastels.
Color the drawing with oil pastels, pretending the paint is not there. Teach students how to use line to make it look like texture or have them color in solidly. Teach students about layering and blending oil pastels and waiting until the end to use black and the dark colors so it won’t ruin the other colors.
Step Four: Outline the Drawing.
Have student outline all the lines of the drawing with black oil pastel. If they colored their animal black, have them outline in white.
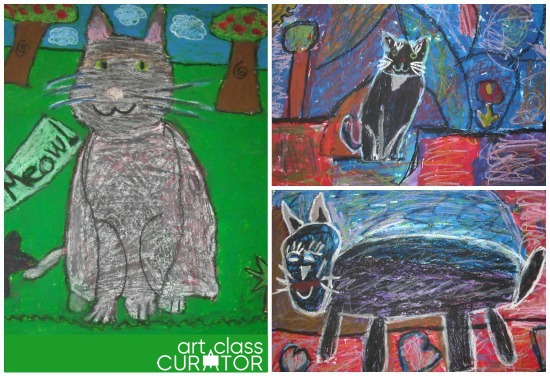
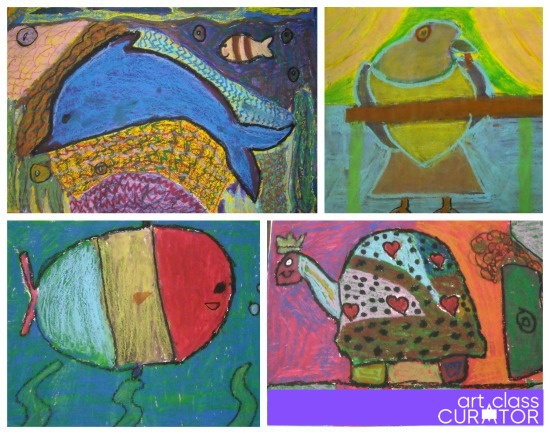
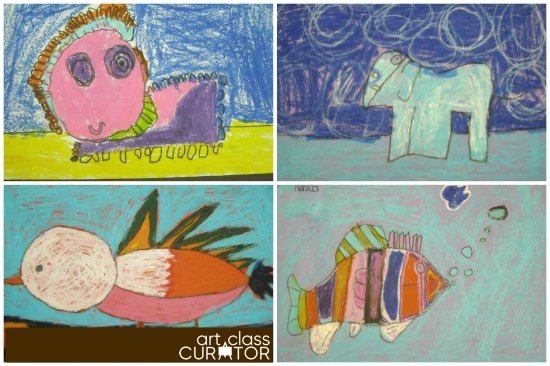
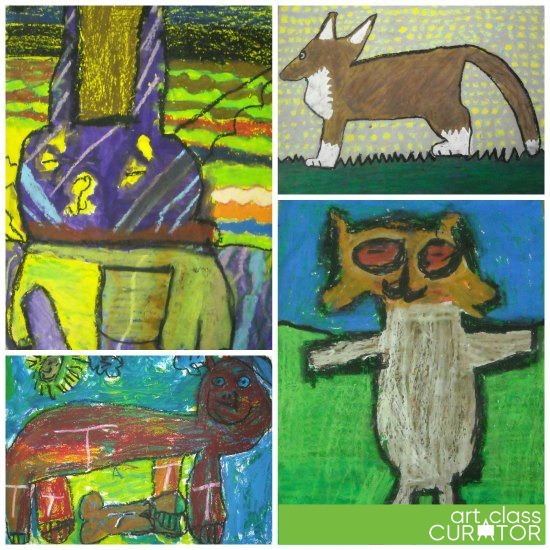
You end up with what would be a wonderfully cute drawing with a potentially messy scribbled coloring job to an interesting, layered, colorful artwork with texture and pop. Look at these amazing examples. I loved them all and wished I could take them all home and hang in my house!
The below examples represent all grade levels K-5 starting with my two favorites: two coyotes by a second grader on the left and a 5th grader on the right.

 Try it out and let me know how you did!

Some really great pieces of art there. Thanks for sharing those tips. My daughter is older and has done some work with pastels and even at her age it’s a challenge to avoid the smudges. Thanks for linking to the Virtual Fridge!
Thanks! Hope she gets to try it out and see if it takes her pastels to the next level. 🙂
Fantastic – I want to have a try myself!
I love the colour-mixing element here too 🙂
#Pintorials
Thanks! Yeah I had to make some of my own for my daughter’s room. 🙂